Are your dull and lifeless concrete floors bringing down the overall aesthetic of your space? Look no further! In this ultimate guide, we will unveil the secrets to transforming those lacklustre surfaces into stunning masterpieces that will leave everyone in awe.
From the initial preparation to the final polish, we have broken down the process into 7 easy-to-follow steps.
Whether you're a DIY enthusiast or a professional contractor, get ready to unleash your creativity and witness the astonishing results as we dive headfirst into floor polishing Melbourne Northern Suburbs concrete floors like never before!
If you're looking to add a touch of elegance to your home or business, polishing concrete floors is a great option. Not only does it give the space a sleek, finished look, but it's also easy to maintain and can last for years with proper care. In this guide, we'll show you the steps for polishing concrete floors, so you can get started on transforming your space today.
Assuming you have already read our guide on choosing the right concrete floor polishing Melbourne Northern Suburbs service for your needs, it’s time to start the actual process. The first step is always cleaning and preparation. This is arguably the most important step because if your floor isn’t clean, the results of your hard work polishing will be lacklustre at best.
So how do you clean and prepare a concrete floor for polishing? First, sweep or vacuum the floor to remove any loose debris. Next, use a damp mop or cloth to remove any dirt or dust that may be clinging to the surface. Once that’s done, it’s time to move on to step two: repair.
Assuming you have the proper concrete floor grinder for your job, begin by grinding the surface of your concrete floor. Start with a coarse-grit diamond pad and work up to a finer one. Remember to vacuum between each grinding stage to collect any concrete dust from the process. Floor grinders typically come with multiple grit sizes, so be sure to start with the coarsest one first.
After the floor has been coarse ground with a metal bond tool, it's time to apply a concrete densifier. This chemical hardener penetrates deep into the concrete surface and chemically reacts to form calcium silicate hydrate within the pores of the concrete. This increases the hardness and abrasion resistance of the surface.
The densifier should be applied evenly over the entire floor surface using a pump-up garden sprayer. Once applied, the floor should be kept wet for at least 10 minutes to allow the product to fully penetrate. After 10 minutes, any excess material on the surface should be removed with a damp mop or cloth.
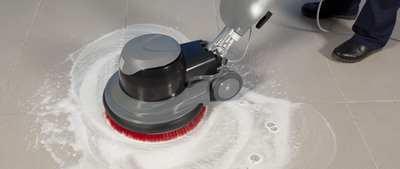
After the concrete floor has been cleaned and repaired, it's time to start honing and polishing. This process involves using a series of progressively finer grits of diamond abrasives to remove scratches and other imperfections from the surface of the concrete. The final step in this process is to use a high-speed polisher with a diamond-impregnated pad to give the floor a glossy shine.
If you're looking for a more matte finish, you can skip the final polishing step. However, remember that a matte finish is more susceptible to staining and dirt build-up than a polished finish.
Sealing the floor is an important step in the process of polishing concrete floors. There are a variety of sealers on the market, and it is important to choose the right one for your needs. A good sealer will protect the floor from stains and other damage, and make it easier to clean.
Once your floor is clean and dry, you can apply decorative stains and colour enhancers. These products can be applied with a brush, roller, or sprayer. If you are using a brush or roller, make sure to work in small sections and wipe up any excess product that gets on the floor. Once you have applied the stain or colour enhancer, you must let it dry for at least 24 hours before continuing to the next step.
After the concrete floor has been cleaned and polished, a protective coating should be applied to keep it looking its best. The type of coating you choose will depend on the level of protection you need and the amount of traffic the floor will see. A clear sealer is a good option for low-traffic areas, while a wax or acrylic finish is better for high-traffic areas.
If you plan to apply a protective coating yourself, be sure to read the manufacturer's instructions carefully and follow them to the letter. The wrong type of coating or an improperly applied coating can damage your floors and void any warranties.
Polishing concrete floors is a great way to add character and style to any home or commercial property. With the right tools and techniques, you can create beautifully polished, durable, and easy-to-clean surfaces. We hope our guide has helped you learn how to polish your own concrete floors in 7 simple steps. If you have any questions, please don't hesitate to ask an experienced professional of floor polishing Melbourne Northern Suburbs for help.
Source URL : https://totalfloorservice.blogspot.com/2023/08/the-ultimate-guide-7-steps-for_14.html